Colourful Norwich skyline illustration

Michael Sage

IT, Digital & Culture

Guest Blog – Respect in Security

I was lucky enough to be invited to write a guest blog just after the launch of the respect in security pledge. Inclusivity and calling out bad behaviour should be key to all we do, especially in public sector. It was a no brainer for us to sign up.

So what is respect in security?

Founded by a group of cybersecurity professionals who have decided to take a stand against all forms of harassment within our industry, ‘Respect in Security’ offers organisations the opportunity to formally pledge their commitment to creating a workplace and professional community free from harassment and fear.

The mission to is give victims and potential victims the knowledge that the industry they have chosen does not support these behaviours, and to arm people entering cybersecurity with the knowledge that their peers and employers are there to support them should they ever be targeted.

Committed to making tangible change in our industry. Our objectives are for organisations to be more transparent and accountable in their reporting channels and to help drive positivity in the interactions we have with each other as professionals within our industry.  A group that is pushing for change, and is committed to working alongside organisations who truly wish to make their workplaces more welcoming and inclusive.

You can find out more about their pledge and sign up here

My guest blog, leading by example,  can be found here (and a big thank you to all those at Respect in Security who helped make the blog possible)

June Update

This one is going to be wordy… I’ve done a few upgrades and changes to the smart static since setting it up and using it for every day holidaying. Over the next few paragraphs I’ll go into some detail. 

The exec summary for those who don’t want to read to much. I’ve added more flic buttons, and more node red flows, I have replaced the switch and access point (details below), I’ve added an emergency pi zero, an external antenna and a new Kasa strip light. I’ve also finally replaced the porch.

Let’s get into the detail!


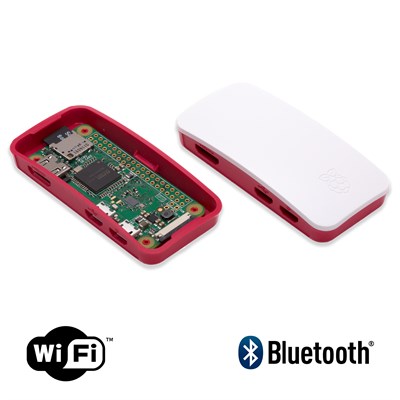
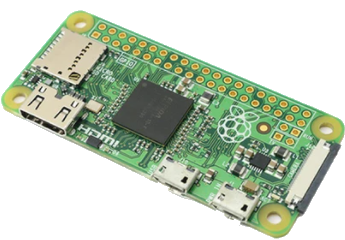
Pi Zero 2 W Photo
Flic Button Logo
Photo of Poynting XPOL-1

Flic buttons – these are amazing and work really well for triggering node red flows. I’m using them without the hub, I might change this in the future as the Bluetooth on the pi isn’t the best, but for now it works ok. I’ve added a second button in the bedroom for triggering a nightlight and easier access. Yes they are expensive, but for a smart physical button there is nothing that comes close.

Hardware additions and replacements

Wifi – I’ve put in a unifi access point which I had spare, expecting the GL-inet to do everything was unrealistic and the device isn’t that great so I’m replacing it one service at a time. I have an old thin client that I’m currently playing with for firewall / router duties, at the moment I’m experimenting with whether this should be a proxmox server or bare mental. In the meantime I’ve added a Poynting XPOL-1 antenna which appears to have stablised the connection at quite a good rate c 20Mbps on EE 4G.

Switching – I replaced the tp link switch with an easy smart one, so I can reboot the ports remotely. I’ve had one to many occasions when a pi hasn’t rebooted properly meaning I’ve had to drive out to reboot. The easy smart range have lots of limitations, but it will do for now, I will probably replace it when I retire a unifi one! 

Smart home – TP Link Kasa have released a light strip which we’ve installed at the front, the rainbow scene is a firm favourite, the one downside is these aren’t supported by home assistant yet.

I have also discovered a flaw in one of my automations, the one that shuts home assistant down it is triggered when the battery is lower than 50%, it works perfectly, but I forgot that when the power comes back on the battery will still be lower than 50% (bugger), so I’ve added a condition that checks the state of the UPS (online vs on battery).

Remote support – I’ve added a Pi zero with VNC to the van, so I can access the network if something goes wrong with the main pi (i.e. it doesn’t reboot), I can then power cycle the PoE switch ports to bring devices back up.

Actual Hardware – when we bought the caravan, one of the “porches” was broken. I managed to source some 1mm aluminium and have bent and painted it. It’s now on the van and works well and looks ok!

Pi Rack & Pi KVM

My Pi Rack including 2 Pi's and PiKVM and USB HDD components
Pi Rack

I decided that I wanted to tidy up my lack rack and put my two Pi’s rack mounted and out of the way. 

The first pi is a backup “server” it runs rsync and has a 3Tb USB drive, it is a staging server between my backups and OneDrive sync. This was easy to do, I printed one module and one pi rack module, works great! I am thinking I might PoE my rack mount Pi’s but this would mean two HATs and a PoE switch for the study.

The second Pi is my Pi KVM, this Pi is slightly more complex as it has some external components, these are mounted in a case, this case was too big for the module, so I 3D printed cases for the individual cases for the rack module. This has tidied it up and it now fits snuggly in the module.

I have done a lot of 3D printing to support the Pi Rack and Pi KVM components, you can see them on the media carousel, links are below.

The printed components are; Modular Pi Rack, USB power splitter case and HDMI to CSI-2 case.

Living the dream

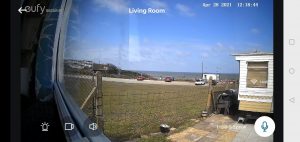
Screenshot from Caravan Cam showing Runton Beach and car park
Eufy Camera

Success! We’ve managed to spend a couple of nights in the van, it all works well, Alexa for the music and the Roku / Plex combo. Other than a couple of issues, below, it’s worked flawlessly and has added benefit without being intrusive. I’ve added some more flic buttons and tweaked some plex scripts (and a UPS buzzer fix), but for actually using the system it has performed really well! 

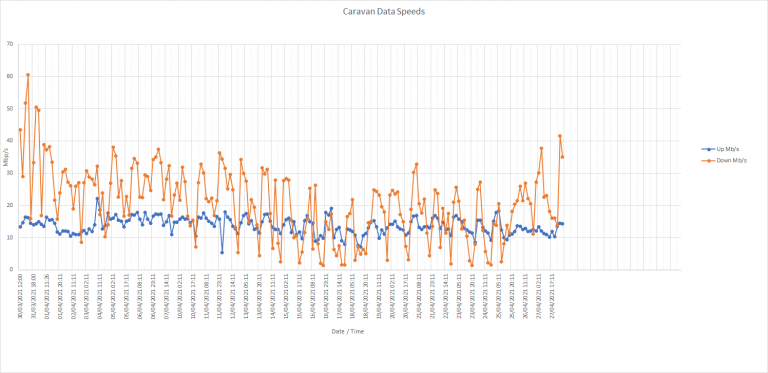
Issues… so there have been a couple of teething problems. The main one being that Alexa frequently loses connection to Kasa, but the Kasa app works fine, a weird one that I haven’t managed to get to the bottom of. I have put in a few more flic buttons to work round it, but it’s still an ongoing issue at the moment. The bandwidth at the van seems to fluctuate a lot (see below), I am intending to replace the GL-Inet device in time, but I am going to wait for an ARM version of OPNSense and will put in another pi for the firewall / VPN attached to some form of 4G or Starlink router. Finally the wireless seems to drop sometimes, I think this might be due to the VPN connection, but I am going to add a TP Link access point to see if it makes any difference. It all works well enough for now though and we’ve spent a lovely couple of weekends there!

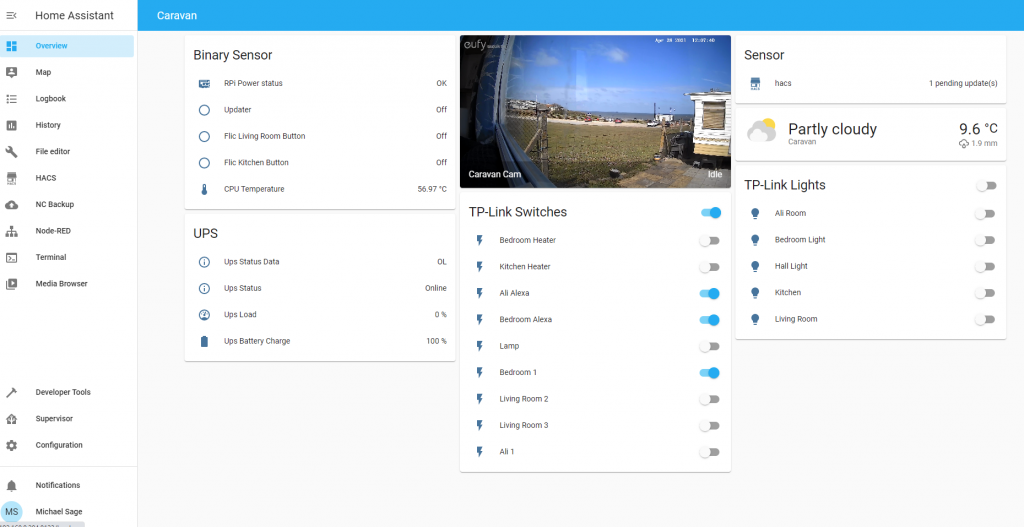
Screenshot of Caravan Lovelace dashboard
HA Dashboard
4G data speeds graph
Caravan Speeds

I must be nuts…

NUT UPS Logo
The Internet - IT Crowd

Safe shutdowns... and startups

I have not idea how stable the power is at the static, but most of the time we will be turning it off when we leave (it might be on for most of the summer when we leave the fridge on). There might also be times we want to preheat the van in the colder months. 

I was working on another project to deliver “internet-in-a-box” for outside broadcasting. This lead me to the open source project NUT, a project designed for controlling UPS units, especially ones whose software sucks (or doesn’t exist for your operating system)

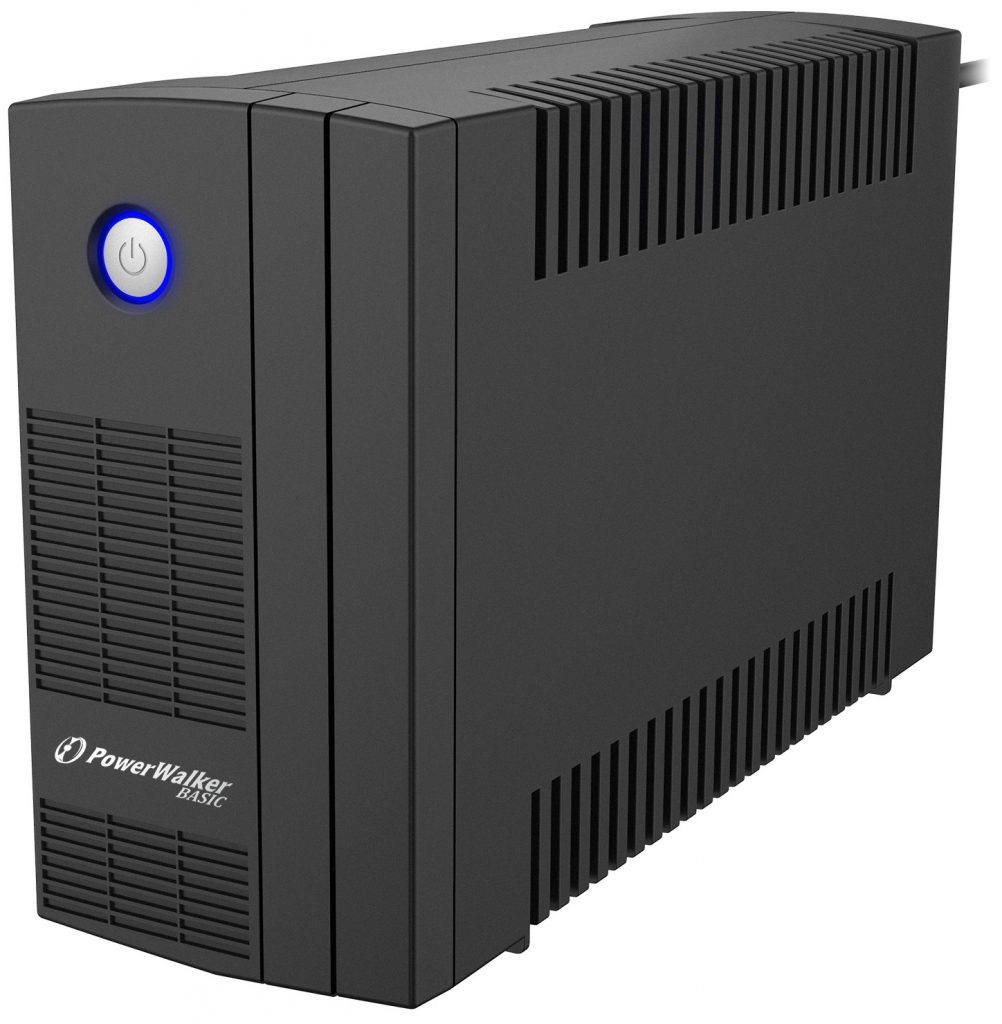
Basic UPS VI 650

Following on from the work I did for the project I decided I could run the van off a UPS which was controlled by the primary Pi and that the home assistant Pi would shutdown should the UPS battery get too low.

 It would also mean that should someone else use the static they would just be able to turn off the power and nut would take care of the safe shutting down of the devices.

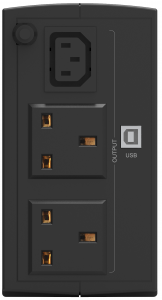
UPS Back
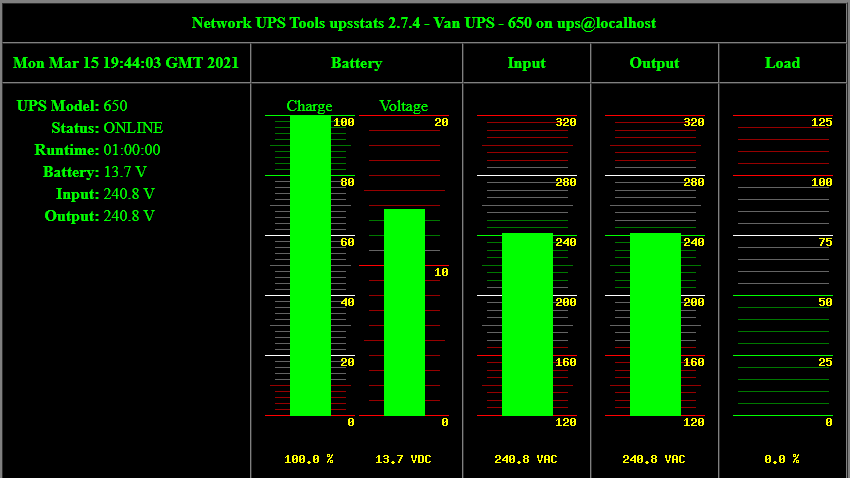
Screenshot of NUT UPS Graphs

I selected a cheap UPS (PowerWalker) that seemed to have reasonable compatibility with NUT and set about configuring it.

The basic NUT configuration was easy. I  setup the netmaster and the CGI site really quickly. Getting the NUT client to work on Home Assistant was easy too, I then setup an automation to shutdown the pi. 

Notifications however were another level of hard, there isn’t that much information out there and it looks like at some point in the past NUT changed formatting in the configs. However, with a bit of work it all came together.

As you can see from the image above I am hardly using any power, the UPS will keep the static active for about an hour after it loses power, while this is great, the main benefit is I don’t need to leave instructions for people to turn the internet or the Pi’s off when they leave!

Why, oh pi!

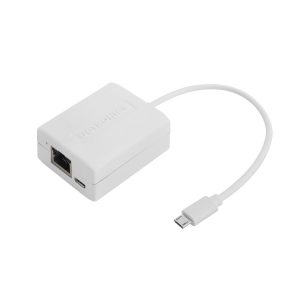
Originally I was going to setup a Pi Zero just to manage the UPS, this was the original spec for the “internet-in-a-box”. I had found a PoE Injector with Ethernet on a single Micro USB (Uctronics PoE), I was excited by this discovery, as it would mean I could power and add wired ethernet to the Pi Zero… I am still waiting for the devices, but a fatal flaw has stopped this working. The Pi Zero only has one USB port… The PWR port only carries power. So although I could power and network the Pi, I had nowhere to plug in the UPS. I will do some more digging at some point as £4.80 for a UPS controller would be amazing!

Pi Zero PoE
Pi Zero v1.3

I got the power…

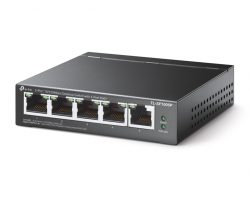
TP Link 4-port POE+ Switch
TP-SF1005P v2

Thinking Infrastructure

Something I hadn’t really given much thought to until this week was how I was going to power the smart static infrastructure, 2 Pi’s and the “network in a box”. 

With the AP1300LTE going back to the manufacturer (the 4G module didn’t work when I started to test), I had some time to think about other bits

In the beginning I was just going to use the power brick for the AP and two Pi Plugs. Then I decided I could run the two Pi’s from a single desktop charger.

Then I did some more reading… The AP could be powered with 802.3 at via it’s WAN port (which can be changed in software to a LAN port).

The Pi 4 can be powered by PoE with a PoE hat (802.3af).

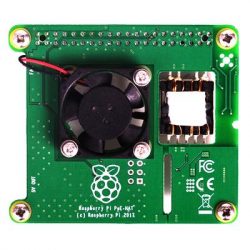
Raspberry Pi POE HAT
Pi PoE Hat

I have used PoE switches from TP-Link and Ubiquiti. I use TP-Link where I basically want a PoE injector for multiple devices and Unifi ones for a more managed solution. 

I did a little bit of research and TP-Link do a 5 port (4 port PoE) mixed at/af switch. For under £25 I could power all 3 devices and have a network and PoE port left over. 

Powering all three devices this way would save on cabling (just one cable going to each Pi and to the AP) and only need one plug socket.  It would also massively simplify things if I wanted to add a UPS at a future date. I could even monitor the UPS via a Pi, safe shutdowns email alerts etc. That’s one for another day though! Adding a small Pi touch screen and a small wireless keyboard and mouse could be fun…

Testing of this idea continues…

Home, sweet home… assistant

The next challenge was to address two big problems

    1. Offline Smart Static
    2. Physical Switches

The first issue is how will everything work if the caravan is offline for some reason. The second is the ability to control all the devices physically. It turns out the problems have the same solution!

This post is very text heavy; TLDR; Flic, HA and Kasa save the day!

The easiest solution to the offline issue is to put in local control, a device that can control devices even if they can’t access the internet (incidentally there is no way I know to fix a no wifi issue, as the devices have to communicate somehow!). The go to solution for this type of issue is home assistant, upon investigation Home Assistant (HA) has a module for kasa, and RTSP for the cameras. The home assistant app is then installed on the fire tablet.

Offline Control – Tick!

Problem two… Physical switches.

I did some investigations there are very few smart switches that support no neutral wire switches. There are a few in the market, but they tend to be supported in Tuya smartlife rather than TP-Link’s Kasa platform.

Was this decision to go with the Kasas going to be a bit of a fatal blow to switches? The main reason I was drawn to the Kasa over Smartlife was the fact the extensions had physical buttons, this still stands. Then I remembered HA had a module for smartlife too… I was about to start buying switches so I could have a play, I really didn’t want to add another platform, but it was looking like it would be the only way…

Then a light bulb moment (literally, as I leaned over to hit my flic button)… Flic buttons could pair to the bluetooth on the Pi and be exposed to HA directly. 

I installed node-red and the node-red flic module and 5 minutes later I had the flic toggling the power on one of the smart bulbs.

A few minutes later two flics were controlling the Kasa lights and it worked offline! 

Physical Control – Tick!

I managed to get physical and offline control working and didn’t have to add another platform or purchase any additional hardware (When I kickstarted Flic 2, I may have slightly bought to many!)

Lights, plugs, action!

Smarting the appliances

When I first started planning before buying the ‘van I thought I would smart everything up. Replace the plug sockets with USB ones, add smart sockets for all the devices, some LED strip lights, on and on…

When we actually took ownership of the ‘van, I realised that this was insane and totally unnecessary.  What basic requirements did I have… One manufacturer for all smart stuff, local and remote control and finally Alexa control.

I will replace the double socket in the kitchen with a USB one to charge the fire tablet while it’s in its mount. The rest I will leave alone. In terms of lighting the ‘van has 6 dome lights, I will replace all 6 with new fittings and smart bulbs in all of them other than the bathroom which will just be a LED.

In terms of power I will add a smart strip in every room, the bedrooms currently only have a single plug socket and the living room has a single double. This should be enough for all our needs, especially as the plugs come with 2 USB ports!

Smart Plugs

While researching various bits I found a number of manufacturers now did extension leads with 3 or more plugs and USB sockets, some of them also had local “button” control. These looked like the perfect solution. I also had another requirement, that any device going into the ‘van had to be easily controlled by home assistant. I was confident the Tuya “smart life” ecosystem would cover all these issues. I searched for a device that fitted the brief in full, unfortunately I couldn’t find one that had the local control, essential for a no internet situation! Honourable mention here for Hey! I’m home who had a great and simple range and if they had buttons on the extension lead I would have definitely gone with them.

In the end the product that fitted the brief the best was Kasa by TP-Link. TP-Link have two ranges, I can’t really work out the difference between the two, I guess it’s an acquisition thing.

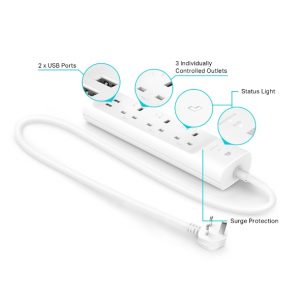
Photo of TP-Link Smart Extension
Kasa KP303

Let there be light!

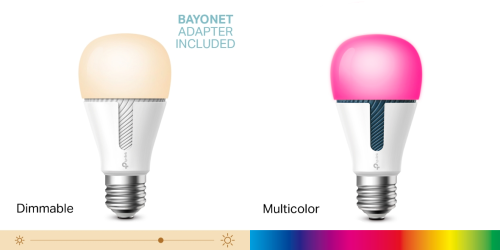
As I was changing all the light fittings any way I decided to try some “value” smart bulbs. At home I am pretty much all in on the Hue ecosystem, not something I would do now if I was starting from scratch. Thankfully TP Link bulbs are good value and has a good range. I purchased colour bulbs for the living space and bed rooms and dimmable bulbs for the kitchen and hall way.  The bathroom will not be smart…

I am hoping that TP-Link will add some outdoor lights to the range as we are planning a deck / patio area in the next few years. Other than Hue there doesn’t appear any strong outdoor lighting solutions yet, so fingers crossed.

Photo of TP-Link Smart bulbs
Kasa Bulbs KL110 & KL130

Smile… Cameras… Action…

Cameras.

I don’t need any cameras at the ‘van, but it’s something I’ve been wanting to explore for several other projects I’ve been thinking about… Can I get a camera, that has an app, has an option for local storage and can stream somewhere else too (RTSP for those in the know)?

I spent aaaaggggeeees researching this, I thought I had hit gold with TP-Link Kasa cameras (TP-Link is the same company who I have chosen for the smart sockets and bulbs, more on that in another post). Unfortunately at the last minute it turns out that they don’t support RTSP, although they do support local recording if that’s what you need. 

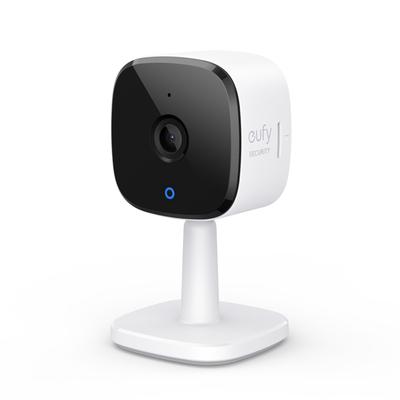
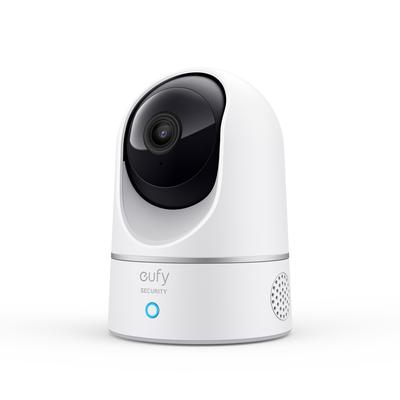
I came across Eufy (who are owned by Anker of USB battery fame). They have a few ranges of camera, the EufyCam range (which has local “home base” controller, with USB NVR capability coming soon and RTSP), a baby monitor range and then a small “Indoor Cam” range. It is the Indoor cam range that caught my eye…

They have four cameras in the range at the moment, a static cam and a pan and tilt cam (both available in 1080p and 2K resolutions). As this is just for fun I went for the cheapest of the four, the Indoor Cam 1080p for a mere £30.

Photo of Eufy Indoor Camera
Indoor Cam 1080p & 2K
Photo of Eufy Pan and Tilt Indoor Camera
Indoor Cam Pan & Tilt 1080p & 2K

So what can a £30 camera actually do… Amazingly, most things…

    • Human / Pet / Object detection – and it works surprisingly well
    • Two way audio – Haven’t tried this at all… Would be amazed if it is beyond ok though
    • Alexa (and Google home) control and integration – Again this works well
    • Night Vision – Clearer than a lot more expensive cameras I have used
    • Storage Options – Micro SD, Cloud and NAS (RTSP)
    • Recording Options – Movement or 24/7
    • Various mounting options
    • The ability to share the device with other users

Full specs on Eufy’s website.

Ok, that’s all great but what does it mean in practice. It means you get a really good camera with loads of options for £30. I am using some of the benefits of the cloud without it chewing through bandwidth trying to upload video to the “cloud”. 

I have the camera setup to record to the SD card, but it also streams to my Pi on RTSP which does 48 hours of recording, the pi will be hidden in the ‘van, so if I decide to use it for security, although they might steal the cam, it’s unlikely they will find the pi, which I can access remotely, etc, etc. Because of the hybrid approach I can also just drop in to the cam from my phone at any time and it pushes motion alerts to my phone at all times too, these alerts can be customised to just push a text alert, or a thumbnail alert, again great for bandwidth sensitive applications. I’ve been asked to provide cameras for churches and other remote locations where there might not be “full” internet available and these would be great for that. 

Amazingly the Pan & Tilt camera’s support “follow the action”: When motion is detected the camera automatically tracks and follows the moving object. Pan the lens 360° horizontally or tilt it 96° vertically to get a clear view of the whole room, these are often on sale for under £40 and I will probably get one to play with at some point to see how good this feature is. 

For well under £100 you could have a two camera setup, with local storage (on a dedicated pi) recording 24/7 with push notifications, now that is cool!

If you wanted to you can also add Eufy’s cloud offering (and that’s an add, not instead, that’s pretty unique). Eufy offer two cloud plans a “basic” plan which is $29.99 per year per camera with 30-day rolling storage or their “premier” plan which is $99.99 per year for up to 10 cameras, again with 30-day rolling storage. The footage is encrypted before being uploaded, which is a nice touch and secures your recording in transit and in rest. 

Static Pi… Yum!

Photo of Raspberry Pi 4 in a black case
Pi 4 in it's pretty case

I decided early on that the caravan needed a brain for the various things I wanted to try. 

I had a spare Pi 4 (2Gb) so I decided to use that! 

What I wanted from it:

    • Basic and Remote Access
    • Movies, Media & More
    • Camera Storage
    • File Sync

Soooo let’s go!

The basics

I tried a number of different OSes, but in the end settled on Raspberry Pi OS, this seemed to be the easiest and most stable for now… This also had the advantage of giving me VNC baked in! This fixed my remote access issue, both over the VPN (see AP/Router post for all the excitement) and over the internet.

Media, Movies and More

I run a plex server at home, and decided I would like an offline copy at the van so we could watch films regardless of if we had an internet connection, there is no TV aerial and I suspect signal would be pretty weak right on the coast anyway. 

Roku is my client of choice so plex makes the most sense for playing films. It will also have iPlayer, Netflix and Prime for when the internet connection is stable and fast enough.

I setup a Plex server on the Pi, wrote a couple of scripts that scan a USB drive for content (which I update when at home). When the drive is removed plex does a rescan to reset the library. This works very well!

Cameras

I wanted to try and setup a camera for local and remote access, perhaps to see what the weather was like, maybe a bit of security. See the Camera post for more information about the hardware and process of choosing it. I have an RTSP stream that the pi captures and stores locally, this gives me a copy of the data off the camera, but not totally offsite yet… There are a number of scripts in place to make sure the pi captures all the data, it detects if FFmpeg has crashed, hung or is just generally misbehaving. It then restarts the process, it also clears down recordings over 48 hours.

FileSync

I run a very small NextCloud server, I downloaded and installed the OwnCloud (yes OwnCloud) client and that syncs the folders, this allows me to copy content to the van from home or anywhere with recovery.

I also setup rclone to sync a OneDrive account, I use Office 365 at home, so this gives me the ability to share files from home easily to the ‘van.

Finally I created a Samba share on the pi so I can use the VPN to copy files from home and vice versa… Lots of options for getting data to and from the van. 

If the internet is fast / stable enough I could even begin to copy the camera recordings if I wanted an off-site copy.

All this off one Pi 4… And finally, because of the camera and smart home equipment I have chosen there is no reason that I couldn’t add a second pi running home assistant and run the whole thing totally offline! Possibly one for when we have finished doing the actual work on the static!